Bread Pudding Reinvented & hello Blogging world

IMG_20170702_205114I was way from this blog since last 3 years. Fortunately, i started writing stories on one blog & Book reviews on another. And Although i wanted to publish many many posts on this blog, the ideas and thoughts were all conceived in mind and evaporated too.

I still kept on reading & blog hopping through beautiful food and gastronomical websites. They were & are still a respite to sore eyes and tired soul.

A lot happened during these 3 years. I lost track of time, gained weight, pondered over things & incidents which were not in my hand. I learnt to let go, learnt to keep people who were closer to me during these tough times. Learnt to love, learnt to forget & forgive, still learning to love myself and trying to get through something called life.

I am still learning to battle through disappointments, trying to understand and cope with the failure. Trying to deal with zillion emotions & be at peace. I am at a crossroads in life, where i really don’t know what should i do. I can’t decide the priority, I don’t know which way of life will lead me to a better way of living.

Honestly, i am lost, as cliched as it may sound i am buried beneath the sands of time. It almost seems as if have crossed all timelines only to know that i am late, terribly late.

Now, i am scared, uncertain of the future, nothing seems to be concrete, the mind has become like a quicksand of emotions. I am still finding a branch of hope to cling on to.

The only oasis in all this black & white life is food, of course. The whole gastronomy behind it, cooking, chefs, cook books, baking books, blogs are nothing short than a soothing therapy for me. I have definitely cooked and baked less in this period. But i have never stopped reading, surfing blogs and of course reading books.

I have amassed a mini collection of cook books and baking books. All these books are close to my heart & someday i will cook through them all.

For now, let us walk through bread pudding recipe.

Who hasn’t heard of Bread Pudding ? It was prime dessert of British Era and featured constantly on the menu of Iranian Restaurants. Unfortunately I was not born during British era and i have never been to an Iranian Restaurant.

I have only had its eggy cousin, flan at a friend’s place during Eid. I was talking to mom yesterday, while making this pudding & she reminisced time spent with her dad on an occasion, where she had bread pudding.

As for me, i had to create my own memory of having bread pudding. Bread Pudding is itself a warm, homely word & somehow it evokes vision of sitting in a cozy place, with a book on lap & a bowl of bread pudding drizzled with Caramel sauce or sweetened cream. It definitely sounds so English.

So yesterday, when i had brought a bit of extra bread to give shape to my ideas which as usually don’t materialize, i had this brainstorm to make some bread pudding.

I typed into trusted google search bar- eggless bread pudding & there popped in  thousand results. I zeroed on Rakskitchen.net‘s bread pudding recipe, because it was so simple and looked elegant.

I  altered the recipe a bit & realized in the process that some of the dishes are meant to be simple not to be touched & tinkered with. Sometimes simplicity is a harder task to accomplish.

Adapted from Rak’s kitchen

Note :- You can completely adapt Rak’s Kitchen recipe or you can tweak a little bit like i did. Following recipe’s ingredients are altered as per my taste & imagination (which failed me a bit)

Cuisine :- British/Fusion Cuisine

Serves :- 3

Type– Dessert

Accompanied with :- Scoop of vanilla ice cream, sweetened cream or caramel sauce.

Ingredients :- 

Half a baguette (6 inch) or 4 to 5 white bread slices

1 cup milk

1 small pinch of saffron

2 tablespoon of roasted cashew nuts

3 tablespoons sugar

1 teaspoon vanilla essence

For caramelisation of fresh fruits :- 

1 medium size banana -chopped into pieces

2 figs- chopped

1 pear- chopped

2 tablespoon brown sugar

To prepare salty caramel sauce :- 

(this i where i went wrong, caramelizing sugar is science and science is my Achilles heel. Please follow the caramel recipe as given in Raks Kitchen or for extra oomph follow salty caramel sauce-Gemma’s Bigger bolder baking)

Method :-

  1. Tear up the baguette into bite size pieces or if you are using bread slices, chop off the brown border and then cut the slices into bite sized pieces.
  2. Pour 1 cup of milk in the bite sized bread pieces and let it soak for some time.
  3. After 10 to 15 minutes of soaking the bread, put sugar, saffron, vanilla essence and mix it well. You can adjust the amount of sugar as per your taste. I like it on the less sweet side.

For Caramelization of fruits :

  1. Take a thick bottomed, non-stick pan on a medium flame. Put brown sugar and let it melt a little bit.
  2.  Put all the chopped fruits and gently let them cook & simmer till they are soft and tender.
  3. Switch off the flame and keep the pan aside.

For caramel sugar or salty caramel sauce – follow the recipes given below in the link :-

  1. Raks Kitchen (for caramel sugar)
  2. Gemma’s Bigger bolder baking (for salty caramel sauce)

For Final assemble :- 

  1. Take a pressure cooker & remove lid’s valve/regulator. Put the cooker on a medium flame and fill it up with water till it covers 1/2  of the cooker.
  2. Take an 8 inch round pan and lightly grease it with butter.
  3. Pour the salty caramel sauce/caramel and let it cover the whole pan.
  4. Let the sauce/caramel set in the pan. Once it sets in the pan, cover with half of Bread pudding mixture.
  5. Then cover the layer with caramelized fruits and finally top it with up remaining bread pudding mixture.
  6. Cover the bread pudding pan with aluminium foil & poke it little bit to let the steam out.
  7. Cover the pressure cooker with its lid and let it steam for 15 to 20 minutes.
  8. Check after 15 to 20 minutes, remove the tin foil & insert a knife or a tooth pick in the pudding, if the tooth pick or knife comes out clean, then the pudding is done.
  9. Let the pudding cool down to room temperature and let it cool in the fridge for minimum 2 hours.
  10. After it is properly chilled, invert the pudding into a plate. Cut into desired piece and serve it with Caramel sauce or vanilla ice cream.


IMG_20170702_210232

  1. I used mangoes in the pudding, don’t do that. It spoils the taste of the pudding. Perhaps a swirl of mango pudding would work fine but not fresh pieces.
  2. I used an 8 inch round aluminium pan. I think a smaller one would work just fine or perhaps mini bundt pan.
  3. Next time I would try and use raisins, black currant, roasted almond and roasted walnut.
  4. Simplicity is the key to success for this dish.


PS- It feels good to be back. A virtual home away from home. Food is nearer and dearer to all of us. For some of us, its a mere way of revitalizing us. For others its a gastronomical experience,every grain, every fibre, every slice and every drop says a story.  For whichever song it sings for us, good food will always be a vital part of our lives.

I’ll try to be more regular in blogging & make something of my life where its worthwhile living. Till we meet again, happy living & eating : )

Thank you for reading.


Posted in Uncategorized | Tagged , , , , , , , , , , , , | Leave a comment

We knead to bake-melon pan bread and a story

She switched on the PC and let the music play shuffle for her..She quietly measured out the flour, butter,  mixed in the yeast, sugar,kneaded the dough with water. She waited for the dough to rise.

She smiled, prayed and hoped that the yeast won’t give up on her. If there was one tumultous relationship she ever had in life then it was the yeast. It was a strict, unyielding and unforgiving..yet when it bloomed and the dough beautifully risen, it warmed her heart too.

In the background, Begum Akhtar was calling out to her beloved- Hamari Atariya. It was an early evening and the sun had just begun its journey towards home. The sky had turned into aWP_003866 WP_003868 golden yellow with splashes of peach and orange color..Like a bride’s exquisite lehenga color, she thought. The dough had risen and she had also made the cookie dough. The slight aroma of lemon zest, vanilla and butter was like floating in a culinary heaven of flavours.   the Evening sky had turned into a gentle tone of purple.

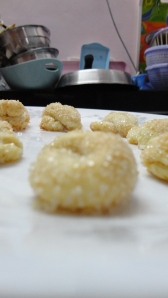
She divided the dough into 4 equal portions, rolled out the cookie dough into 4 equal round shape enough to cover the ball of bread dough. After dipping them into caster sugar, she took the blunt side of knife and slashed the top of the buns in crossed diamonds design.

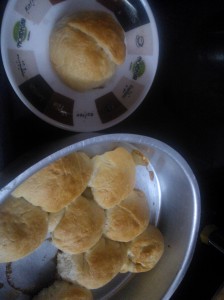
She waited for them to rise again. Finally she slid them into the hot oven to bake. After 25 minutes, when she took out the hot pan from the oven..the melon bread seemed to smile at her.Uneven, not perfect, she was not in the league of the extra ordinary bakers she knew. But one thing was sure, if not for baking, reading and listening to music she would’ve gone insane a long time back.

She gently took out the sugar crusted bun on a plate and her cup of coffee..in the background, ghulam ali was singing about a agreement between two lovers..

Thanks a lot, Aparna for this month’s “we knead to bake” challenge. Not up to the mark, but we loved the taste at home.(PS- and i promise i will bake them again )Here is the recipe :-

Please see this video before you start making the bread.  http://www.youtube.com/watch?v=5z0e-GKJA10

Melon Pan (Japanese Melon Bread)

Adapted from A Bread A Day  http://www.abreadaday.com/?p=1503

For bread dough:

1 3/4 cups all-purpose flour (plus extra as required)

2 tbspmilk powder

1 tsp instant yeast

1/2 tsp salt

1/3 cup cold water

1 egg, beaten

1 tbsp sugar

25gm butter, at room temperature

1/3 cup chocolate chips

For cookie dough:

1 1/3 cups all-purpose flour

3/4 teaspoon baking powder

A large pinch of salt

60gm butter, at room temperature

1/4 cup castor sugar (increase to 1/3 cup for sweeter dough)

1 large egg

1/2 teaspoon vanilla extract

1 teaspoon lemon zest

Castor sugar for dusting (granulated sugar will do too)

Method:

Please watch this video, before you start on this bread so you have a good idea on how to shape the Melon Pan. Whisk together the flour, powdered milk, yeast, and salt in the bowl (or the bowl of your machine if using one). In a smaller bowl, beat the egg and cold water together with a fork till well blended. Add this to the flour mixture in the bowl.

Knead (on low speed in the machine) till it all come together as a dough and then (on medium speed) until you have a somewhat stiff dough. Add the sugar and knead well.

Now add the butter and knead (first at slow speed and then on medium) until the butter is completely incorporated into the dough and the dough becomes smooth and elastic. The dough should well-kneaded to develop the gluten.

Shape the dough into a round, and place it in a lightly oiled bowl. Cover and let it rise till double in volume (about an hour or so).

During this time make the cookie dough. In a bowl, cream the soft butter and sugar till fluffy. Add the egg and vanilla extract and beat till combined. Whisk together the flour, baking powder and salt and add this to the bowl. Also add the lemon zest. Beat together until just combined.

Shape the dough into a cylinder (this will make the dough easy to divide and flatten out later), and wrap in cling film. Refrigerate the dough until required.

Now go back to the bread dough. Once it has doubled in volume, place it on a lightly floured work surface. Lightly grease your baking sheet or line it with parchment. Deflate the dough gently and divide it into 8 equal portions.

Shape each portion into a smooth ball like for bread rolls. Work with one portion and keep the others covered so they don’t dry out.

Unwrap the cookie dough. It should be reasonably firm now and easy to work with. Slice the cylinder of cookie dough into 8 equal portions. Use two pieces of plastic sheets or cling film to flatten the cookie dough. Place one slice/ round of cookie dough on a piece of plastic sheet/ cling film. Cover with another piece, and using a flat bottomed pan, press down on the dough to flatten it, until it is reasonably thin but not very much so.

Carefully take on ball of bread dough (it will have puffed up a little so don’t deflate it), and place the circle of cookie dough on top of it. Gently press the cookie dough edge to the bread dough ball so that it covers the top and sides of the ball, but leaves the bottom open. Gently, holding the covered bread dough by the underside, press it into some castor sugar. Then using a scraper, or the blunt side of a knife, mark the top of the cookie dough side of the bread roll with a cross hatch/ diamond pattern. The pattern should be deep enough (otherwise it will disappear when the bread rises and bakes) without cutting through the cookie dough layer into the bread.

Place this on the greased or parchment lined baking sheet. Repeat this with the remaining cookie dough and bread dough balls. Let them rise for an hour.

Bake them at 180C (350F) for about 25 minutes, until the tops of the Melon Pan just start turning brown. If you let them brown too much, the underside of the bread will burn. Transfer to a wire rack to cool thoroughly.

This recipe makes 8 medium to largish Melon Pan. Melon Pan are best eaten the day they are made. However warming them slightly before serving the next day is also fine.

Posted in Uncategorized | Tagged , , , , , , , , , , , , , , | 2 Comments

The end of the year post..but definitely not the end

Finally its the end of the year..And here we are as a group “we knead to bake” completing the first year of baking and ushering in the new year. Amen to that !

And what a whirlwind of a year this had been. In terms of baking, reading books, and of course life.

As a group and also as an individual, i learnt so many types of breads. Including there came a point in my baking life where my mom used to ask me about the next month’s challenge.

And now when the year as comes to an end, i feel as if the all breads i baked are passing me by slide wise, my turbulent relationship with yeast, the praises, help, encouragement. Bread baking was definitely my mood lifting medicine, and the biggest joy was and always will be when the dough rises. The yeasty flavors mingled, the dough gently rising.

Its strange and fascinating, that how basic ingredients like-flour, water and yeast make way for different types of bread all over the world. Its the staple food of our life..whether it may be our simple non yeast required chapati or pain de campagne  or the most elegant of all croissant.

How has this year been for you ?

For me this year, well it has been a non significant year. I have gained nothing except weight, some wisdom perhaps, made some friends for life, bought books by the trunk loads ( so much that i was addicted to buying, but not reading them)..But well such is life..unpretentious, sometimes boring and sometimes out of the blue interesting and unpredictable.

But now back to the bread saga.

I was so very happy and excited when Aparna Ma’am added me in the group, it was like being initiated in a secret group : ) And i was also scared when she said that she would remove non active members who had not yet started baking from the group. That definitely scared me, and i knew then and there that i had to take out all my baking pans, not so trust worthy yeast and start baking.

Good lord ! it was fun ! The anticipation and guessing of the next month’s challenge, the rushing and the last minute baking, my very amateur photography skills.

I know this much, being a part of this group We knead to bake and baking has installed in me a little bit of confidence while baking bread. So thank you so much, Aparna Ma’am.

Yes, i still fume and rant about the yeast, but most of the times when things go wrong in baking (or in life) its my fault.

Without much further ado, i present you the December’s month the German star – . Bienenstich Kuchen (German Bee Sting Cake)

And now just as much as you must have realized or guessed by now, my bread turned out to be something else.

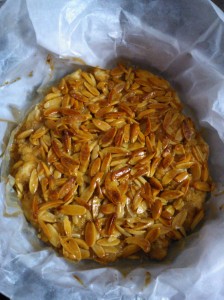
This German bee sting being a show stopper cake, was actually a show stopper..it actually stopped the show for me in not so bad way..But well let me put into this way, i introduced to mom this as an almond cake primarily and ate the custard all by myself.

Let us now proceed towards the recipe, with keeping few points in mind.

1. read read the recipe !

2. Use your intuition when it comes to baking.

Wish you all a very merry Christmas and a very prosperous new year in life and in baking : ) Feliz Navidad

German bee sting cakeHere is the recipe. I have made no changes to it. This beautiful, delectable yeast cake can be served as a king’s breakfast or a dainty dessert served with whipped cream.

BienenstichKuchen (German Bee Sting Cake)

Ingredients:

For the Pastry Cream Filling:

250ml milk (I used 2%)

3tbsp sugar

3 tbsp vanilla flavoured custard powder

200ml cream (I used 25% fat)

1 tbsp corn-starch

For the Dough:

1/4 cup milk (I used 2%)

100gm butter, at room temperature

2 cups all-purpose flour

2 tbsp sugar

1 egg

3/4 tsp salt

1 1/4 tsp instant yeast

For the Honey-Almond Topping:

50 gm butter

1/3 cup sugar

2 tbsp honey

1 tsp vanilla extract

2/3 cup almonds, sliced* (see Note above)

Method:

Make the custard for the filling first. This can be made the previous day and refrigerated till required.

Keep aside 1/4 cup of milk, and put the remaining milk and the sugar in pan. Over medium heat, bring this to a boil while stirring frequently to dissolve the sugar. In the meanwhile, dissolve the custard powder in the 1/4 cup of milk. Add this in a stream, to the boiling milk and keep whisking so that no lumps are formed.

Keep whisking until the custard becomes very thick. Take the pan off the heat and let the custard cool to room temperature. Whisk it on and off so it stays smooth. If it does become lumpy after cooling, use a hand blender to make it smooth. Transfer to a bowl, cover and refrigerate.

Once you are ready to fill the Bienenstich, whip 200ml of cream till soft peaks form. Then add the corn-starch and whip till it forms stiff peaks. Whisk the custard to make sure it is smooth. Gently fold the cream into the custard. If you feel it is too soft, refrigerate for a couple of hours and then use.

To make the dough, heat the milk until it is quite hot but not boiling. Cut the butter into pieces and add to the milk, stirring it until the better melts completely. Let it cool a little.

In the meanwhile, put the flour, sugar, salt and the yeast in the bowl of your processor. Run a couple of times to mix well and then add the egg (leave the egg out if you don’t use it). Run again till the egg has also mixed well. Now add the butter-milk mixture (it should be warm, not hot) and the then knead till it forms a smooth and soft (loose) brioche-like dough that’s just short of sticky. It should come way from the sides of the bowl and be easy to handle.

Shape the dough into a ball and place it in a bowl. Cover loosely and let it rise for about 1 1/2 to 2 hours. This dough will rise quite well but not to double or as much as your regular bread dough.

Deflate the dough, and shape again to a smooth ball. Place it in a8”spring form cake tin lined with parchment. It is important to do this otherwise the topping will make the bread/ cake sticky and difficult to unmould. Flatten the dough a little, pressing down lightly so that the dough fits the cake tin. It doesn’t matter if its not touching the sides like batter does. Let it rise for about 30 to 45 minutes. It will not rise very much and look a little puffy.

Prepare the topping while the dough rises. Melt the butter, sugar, honey and vanilla in a small pan, over medium heat. Keep stirring frequently and it will start bubbling up. Let it cook for about 3 minutes or so until it turns to a light beige colour. Add the sliced almonds, and stir well till the almonds are well coated. Take the pan off the heat and let it cool a bit. The mixture will become quite thick.

Now get ready to bake the bread/ cake. Once the dough has risen, use a spoon take bits if the topping (it will be quite thick, like a sticky fudge) and distribute it uniformly over the surface. If there are small gaps they will get covered once the bread/ cake is baking.

Bake at 180C (350F) for about 25 to 35 minutes until the top is golden brown and bubbling. A ckae tester through the centre should come out clean. Let the cake cool in the pan for abpout 15 minutes. Then gently loosen the sides with a spatula and unmould. Let it cool completely on a rack.

When it has cooled completely, slice the cake into two equal layers carefully, using a very sharp knife. Spread the pastry cream on the lower layer and top with the upper layer and refrigerate till ready to serve.

This recipe should serve 8 to 10.

Posted in Uncategorized | Tagged , , , , , , , , , | Leave a comment

the sound when you make tea

Once upon a time on an October evening, when i was watching “Eat,drink,man, woman” , i got hungry. So as not to spend much time in the kitchen, my mind offered me the solution to make tea. Solution accepted.

With the sounds and the visuals of the movie still fresh in my sound. The simmering of the soup, chopping of radish into beautiful julienne, tempering, frying in hot oil, the gentle making of an artisan dumpling. The beautiful assortment of vegetables & meat in a bamboo bowl, complete color coordination, skinning of fish, The final touches to the meal. It rustled my appetite to the core and i visually feasted on those heavenly morsels even though i am a vegetarian.

So when i ventured into the kitchen., it was as if my sense of hearing was enhanced to another level. i took time for everything, I wanted to capture sounds of every single thing around me. I wanted to stand there and start writing. But i also didn’t want the tea to get burnt.

I opened the cupboard, took out one tiny steel bowl fitted in nicely with other steel bowls. I opened the fridge and the dim yellow luminescent light and all the other ingredients greeted me. I searched for a tiny piece of ginger among the transparent polythene bags, among the various assortment of lipsticks,soya sauce, coffee and bournvita. But la ginger was missing. Never mind, i said to myself. I took out the giant bowl of milk and placed it on the platform. I flicked the gas lighter to the burner and it jumped up to life. The little purple light glowing from the burner looked as if hundred tiny elves were dancing for some secret ritual. I gingerly placed the bowl and put some water in it. Took 2 teaspoons of tea from the tea container and let it gently simmer for couple of seconds.

I opened again the freezer compartment. And a bag of mixed citizens ingredients looked at me. There was the tiny bag of chocolate chips, huge pack of strawberry ice cream, spices, cocoa powder. I took cardamom, crushed it and put into the boiling tea water, in goes the milk and just on a whim i added a tiny stick of cinnamon. Oh the heady aroma of cinnamon, sweet, spicy..I could inhale it all day long. Its one of the most magical spice we have.

The tea gently simmered till it reached that gentle golden color and scent of cardamom, cinnamon and tea heating your nostrils..ahh imagine these in a tea time cake or a cookie..Heaven, my friends is made of fragrance and the sounds..those little ignored sounds when you cook or even make a cup of tea.

In all these simple process of making tea, i could actually hear sounds of water being poured into the bowl, cardamom being crushed, the milk being poured into the bowl, the sound of closing and opening the fridge door.

the tea gently simmering

the tea gently simmering

WP_002478 WP_002479 WP_002482

Its symphony if you realize it and its just a mundane activity if you ignore it.

Posted in Uncategorized | Tagged , , , , , , , , , , , , | Leave a comment

A story for “lunchbox” and honey comb rolls-khailat nahal

This is how i feel right now.. Imagine a little kid in school, who has completed her homework for the first time on time, no dead lines, no rushing against time, no sharpening your pencils..you have finished your homework and now you can go out and play ! hurray for that !!

And that is what i feel right now ! After Aparna declared September’s month challenge, i knew i had to pull up my (ankle) socks and bake. And boy ! what a delicious adventure it was..Sweet honey comb rolls..Filled with paneer, dates, raisins and cashews encased in a soft bun..it was my idea of heaven.

Thank you for the challenge !!

So have you seen “the lunchbox”..If not you can see the trailer over here lunchbox and also see the movie which should be running at your nearest theater.

I know i am talking a lot about this movie, but i believe good movies need to be seen, to be talked about and to be kept in your heart for a long time to inspire you..Cliched..i know.

More than the food being shown in this movie, this movie also concentrates on those little snippets of happiness in our lives which we constantly crave for and strive for.

Don’t we all try that, day in and day out..What are your little moments of happiness ?

For me it would be :-

1. a perfect cup of ginger tea or a well made cup of black coffee

2. toasted warm bread with butter

3. day of productivity at work.

4. to watch  sunset while going home.

5.getting a phone call from friend.

6. not to share a piece of chocolate : )

7. to read a few pages from a book

8. and to sleep peacefully

I would like to know yours too..

And back to the bread..This honey comb roll is perfect for a royal breakfast treat. I have not made any changes except halve the recipe. (I am still trying to figure out why my food processor growled like a monster, when i tried to grind paneer in it)

And on a serious note, i think should try to upgrade my almost non existent photography and presentation skills. Food should also look good enough to entice your appetite.

You can also find the post over here at my diverse kitchenWP_002273 WP_002276 WP_002277 WP_002279 WP_002280 WP_002281

Here is the recipe :-

WE KNEAD TO BAKE #9 :KhaliatNahal (Honeycomb Buns or Bee’s Hive Buns)

This moth we’re baking bread that can be made sweet or savoury. It is easy enough to make and what is unusual is that it is filled and then covered with a sugar syrup/ glaze which is typical of Middle Eastern confectionery.

Khaliat al Nahal (also known asKhaliatNahal) translates as Bee’s Hive in Arabic. This is because the buns are baked close to each other in a round pan where they form a honeycomb like pattern. They’re traditionally made sweet and glazed with honeyflavoured syrup, though savoury versions are also made.

This recipe makes 18 smallish buns, and if you want fewer you can halve the recipe to make about 9 or 10 buns. For half the recipe, use a 6” or 7” round cake tin to bake the Honeycomb Bread.  You can also bake them individually in muffin tins if you prefer, except they would not have their characteristic “honeycomb” pattern.

Traditionally, the filling used in this bread is a small piece of plain cream cheese but here choice of filling is entirely up to you. You can make it sweet or savoury. I used a mixture of sliced spring onions and paneer spiced with mixed dried herbs and red chilli flakes.

I plan to make the sweet version some time in this month and will update here when I do so.Please link only to my post when you are posting this bread, as I have adapted this recipe from different recipes and then made some changes of my own.

Here’s a good video to watch in case you think you need it. http://xawaash.com/?p=6593#sthash.WYkAg0DL.dpbs

KhaliatNahal (Honeycomb Buns or Bee’s Hive Buns)

For the dough:

Ingredients:

1 cup lukewarm milk

1 1/2 tspinstant yeast

1 tspsugar

2 1/2 cups all-purpose flour

3 tbsp sugar (for sweet bread)

3/4 to 1 tsp salt (for savoury bread) OR 1/4 tsp salt (for sweet bread)

40gm butter, melted

2 tbsp milk for brushing the dough

2 tbsp white sesame seeds for sprinkling on top (optional; only for savoury bread)


For the filling:

1 cup of filling (approximately) of your choice, either sweet or savoury

Savoury – cream cheeseOR crumbled feta cheese OR crumbled paneer/ cottage cheese, flavoured according to your choice. You can also use any other savoury filling that you want. I used a combination of crumbled paneer, herbs, chilli flakes, a little garlic and chopped spring onion.

Sweet – cream cheese (traditional filling), or any other filing of your choice like chocolate,   dried fruit like dates, raisins, chopped nuts, chopped fruit , sweetened coconut filling, etc.

Sugar Syrup/ Glaze:

3/4 cup sugar

1/2 cup water

A pinch of saffron

1 tbsp honey

1 tsp lime/ lemon juice

Method:

Make sure your melted butter has cooled down a bit before using it. Put 2 cups of the flour, salt, sugar (if making the sweet bread only) and melted butter in the bowl of your processor. Run a couple of times to mix well.

Combine the milk, sugar and yeast in a small bowl and keep for 5 minutes. Add this to the processor bowl and knead until you have a smooth and elastic dough which is not sticky. Add as much of the remaining 1/2 cup of flour as you need to get this consistency of bread dough. I used all of 2 1/2 cups of flour for mine.

Shape the dough into a ball and place it in a well-oiled bowl, turning it to coat completely with the oil. Cover and let it rise till double in volume, for about an hour.

Turn the dough out onto your work surface. You won’t really need to flour it as the dough is quite manageable as it is. Cut it into 2 halves. With your palms, roll out each half a “rope” about 9” long. Cut each rope into 1” pieces so you have a total of 18 pieces.

Take each piece and flatten it out a little and place half a teaspoon of filling in the centre. Pull up the sides and wrap the dough around the filling, pinching it closed at the top. Smoothen it into a round ball. Place this in a well-greased round 9” cake tin. Repeat with the remaining 17 pieces and the filling. Arrange the filled balls of dough in concentric circles, filling the base of the cake tin.

Cover with a kitchen towel and let it rise for about 30 to 40 minutes. Brush the tops with milk and sprinkle the sesame seeds over this. Don’t use the sesame seeds for sweet bread, only for the savoury one. Bake the buns at 180C (350F) for about 25 minutes, until they’re done and a nice golden brown on top.

Let them cool in the tin for about 5 minutes and then on a wire rack.

If you’re making the sweet version, make the sugar syrup/ glaze during the first rise of the dough. For this put the sugar, water and saffron in a small pan and bring to a boil. Turn down the heat and let it simmer for a few minutes until it starts thickening a bit. Take it off the heat and add the honey and the lime/ lemon juice. Mix well and let it cool. Keep aside till needed.

When the sweet buns come out of the oven, pour the syrup all over the top of the “Honeycomb”.  The bread should be hot and the syrup/ glaze should be cool. If you want your Honeycomb Buns to be less sweet, just brush the syrup/ glaze over the top.

Let it sit for a while for the syrup/ glaze to set a bit. Serve them warm with tea/ coffee.

While writing this post, which took me two days -thanks to my laziness and power cut.

and i also listened to two songs- 1. Le festin from Ratatouille and 2. Atlas by Cold Play 

Posted in Uncategorized | 3 Comments

Kugelhopf..my quest with destiny

I feel like the hero in an obscure indie movie- where the he talks to himself  “i have yet to meet my destiny”. And then out of nowhere, a girl wearing a summer dress walks up to him and introduces herself as “Hi, i am destiny”

Do you feel the same ? How and when did you start baking or any passion in your life. How did that passion introduced to you ?

For me, it was the succulent, indulging, heavenly smell of chocolate in a bakery when i was studying in another town, the perfect brown crust, occasional treats of black forest cake, slice of spinach bread, heavenly mawa cake of kiyani bakery and dear lord how can i forget the boozy christmas plum cake. I knew my calling, i knew my slice of heaven, It was in the crumb, the crust, the flavors.

I started baking just recently 3 years ago. And eventually the best relationship i ever had was with my darling darling oven. Sometimes when i am all lovey dovey i kiss the oven ..Do you do that too ?

And then when i started baking, with the help of relatives, friends and bloggers. Almost all my knowledge of baking comes from them . I was so addicted to foodgawker that i use to check  it out every morning and i still do the same. So many ideas, so good photographs, its like i am floating in virtual heaven.

But then, surfing and reading n number of food posts, doesn’t mean that you are an expert in baking and the same goes for me too.

My adventure with “we knead to bake” group had failed miserably two times. And this time, i had almost drafted a “resignation” letter in my head to quit this group.

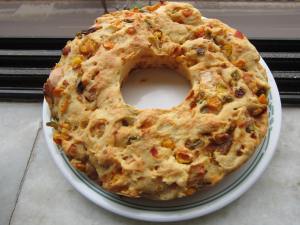
So here was this month’s theme “kugelhopf”. Savoury bread cousin of sweet “kugelhopf”.

I have already passed the date to post this month’s challenge. But here i am all again to write and bake the bread.

Fingers crossed.

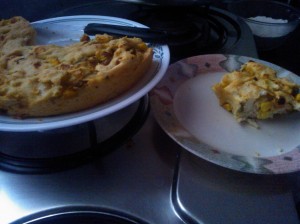
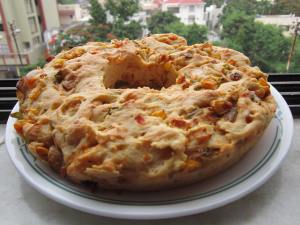
And hurray the bad baking spell is finally broken. Here i am finally with the Kugelhopf and a messy birthday cake baked for dear mom.

Thanks a lot, Aparna. (for re installing my faith in baking )

Also sending this recipe to My diverse kitchen-We knead to bake #7-Savoury Kugelhopf

Few notes :-

1. i’ve halved the recipe, hence the small kugelhopf.

2. Substituted eggs with 1/2 cup of yoghurt.

3.used processed cheese and handful of corn and raisins.

WP_001898 WP_001899 WP_001902
IMG_0204 IMG_0206 IMG_0209

The recipe :
Kugelhopf (also spelt as Kugelhupf, Gugelhupf, Gougelhof, Kugelhoph, Kugloff Kuelopf, Kouklouf, Köjlhopf, Koejelhopf, Koïlopf, Köjhupf!) is a yeasted sweet cake well known in the Alsace region of France, as well as in Germany, Switzerland, and Austria, and variations of this are also found in some countries of Eastern Europe.

Though this yeasted cake is really thought to be Austrian in origin, it is more known as Alsatian. The most commonly told story about the Kugelhopf is that Marie Antoinette (the same lady of the “let them eat cake” fame!) brought it from her home country Austria, to France upon her marriage to King Louis XVI.

Savoury Kugelhopf
Ingredients:
3 to 3 1/2 cups all-purpose flour
2 tsp instant yeast
1 tsp salt (or to taste)
75gm butter, at room temperature
3/4 cup milk
2 eggs, beaten lightly
1 tsp oil
1/3 cup chopped green bell peppers
1/3 cup deseeded, pulp-free and chopped tomatoes
1 cup onions, finely chopped
1/2 cup diced cheddar cheese (preferably sharp)
1/3 cup coarsely chopped walnuts
1 1/2 tsp coarsely crushed black pepper
1 tsp dried thyme
Method:
Once again I used the processor. This can be done by hand but it will be a bit sticky to handle. Put 3 cups of flour, yeast, and salt in the bowl of the processor. Pulse a couple of times to mix. The add the butter, a little at a time, and process till incorporated.
Add the warm milk and process till mixed. Now add the eggs and process till mixed. You will now have a soft and sticky dough. Knead some more, adding more flour, a little at a time and just enough till the dough pulls away from the sides of the bowl. Do not be tempted to add more flour than absolutely necessary.
Your dough will be very soft, elastic and just short of sticky. Transfer the dough to an oiled bowl, cover and let it rise until double in volume. This can take from 1 1/2 hours to 2 1/2 hours!
In the meanwhile, heat 1/2 a tsp oil in a pan. Add the chopped green bell pepper, the tomato and a pinch of salt and stir-fry till the raw smell disappears but the vegetables are still crisp/ crunchy. Remove and keep aside. To the same pan, add the remaining 1/2 tsp oil and sauté the onions with a pinch of salt till they turn golden brown. Remove and add to the bell peppers and keep aside.
Grease an 8” kugelhopf mould or bundt pan well especially around the centre (or whatever pan/ tin you plan to use). Place some of the chopped walnuts in the bottom of the mould. If you’re using a loaf tin or brioche moulds, then don’t do this. Instead press in the walnuts on top of the dough after the second rise, just before baking.
Once the dough has risen, deflate it. Then work the cheese, stir-fried onions, bell pepper and tomato, the remaining walnuts, black pepper and thyme into the dough. The best way to do this is to flatten the dough out and spread all this over the surface, fold the dough over and then knead it. This will ensure a more uniform incorporation of the “filling”. The dough will be a bit sticky, so use a scraper to help you with the kneading. Do not add more flour!
Roll the dough into a longish log, long enough to fit into the mould comfortably. Lift the “log” of dough and place it in the mould in a circular fashion and pinch the two ends together to close the “circle” of dough. Cover and let the dough rise for about an hour or so, until it reaches the edge/ rim of the mould.
Bake the Kugelhopf at 200C (400F) Pre-heat oven to 400 degrees for about 35 to 40 minutes until the top is golden brown and sounds hollow when it is tapped.
Unmould the Kugelhopf and let it cool on a rack. Slice and serve. This Kugelhopf should serve about 10 people and is also good for breakfast, as a snack or served with a simple soup.
Posted in Uncategorized | Tagged , , , , , , , , | Leave a comment

Cloudy with a chance of…doughnut !!

Read the following lines in Shahrukh Khan’s voice-“what is it about doughnuts, that  makes one so happy. The smile on their faces, the twinkle in their eyes..Is it the texture, or the sweetness or the glazed doughnuts which takes you into a happy journey. For whatever, what it may be..a doughnut & a cup of coffee will always make your day”

Now, my far & few readers, imagine writing this post without actually making doughnut. And that is what i am actually doing..writing down the post without the doughnut..early in the morning before going to work.

We knead to bake ‘s challenge for the month of june was “doughnuts”. Needless to say i had made plans to make doughnuts in advance and had actually taken an off at work to do that. But like all great plans, this turned out to be just a plan and i ended up doing nothing except watching two movies back to back & baking one lousy litchee cake.

But back to doughnuts. Fingers crossed and i don’t want it to be a disaster like the last time.

So i am finally back with the doughnuts. or rather sans doughnuts. The “we knead to bake” this month theme was to bake delicious doughnuts. Needless to say, all my fellow bakers had excelled in their creativity in presenting and baking the doughnuts in the best possible manner.

As usual, i was late and something again went wrong with the doughnuts. This time, i am clueless. So if someone can guide on to what went wrong or may be i have just lost my baking mojo.

Now here is the awesome recipe for doughnuts and some pics will follow at the end of the post

May i still say it was a good sunday. Here are the reasons why-

1.  finally got approved at the Daring Kitchen, that means more experiments in the kitchen.

2.Discovery of 8tracks.com. What an awesome website that is..Music and some more music.

3. Some amazing and “deep” conversations with bro : )

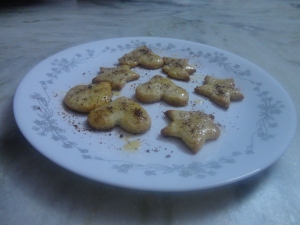
4. Bro also gave me a good idea that i should not call these doughnuts as doughnuts but “cookies” or “Naan khatais”

That’s all for now folks !!

Recipe

(as adapted from Lara Ferroni’s doughnuts)

Baked Yeasted Doughnuts

(Adapted from Lara Ferroni’s Doughnuts)

Ingredients:


1/4 cup superfine sugar

1 cup warm milk (45C/115F)

3/4 tbsp instant yeast (or 1 tbsp active dry yeast)

1/2 tsp salt

2 tsp vanilla extract

1 cup cake flour (or 1tbsp cornstarch + enough all-purpose flour to make up to 1 cup)

1 1/2 to 2 1/2 cups all-purpose flour

100gm cold butter, cut into 1 inch cubes

For the topping:


about 1/2 cup melted butter for brushing

1 cup superfine sugar + 2 tbsp cinnamon (more or less, depending on your taste), mixed together

OR

Glaze of your choice

AND/ OR

Jam for filling doughnuts

Method:


Using a processor to knead helps but you can do this by hand.

Put the sugar, milk, yeast, salt and vanilla in the processor bowl and pulse to mix well. Add the cake flour and 1 cup of all-purpose flour and process, adding a little more of the flour as necessary till the dough is thick and pulls away from the sides of the bowl.

Now add the butter pieces one at a time and process till there no large chunks of butter are left in the bottom of the bowl. Now add a little more flour until your have a soft, pliable and elastic dough that is most but not overly sticky.

Turn the dough out onto a floured surface and knead gently until the dough no longer sticks to your hands. Shape the dough into a ball and place in a lightly greased large mixing bowl., turning it to coat well. Cover with a damp towel and let it rise till double in volume. This should take about an hour.

Punch down the dough and roll out to a thickness of 1/2″ thickness. Cut out doughnuts using a doughnut cutter or whatever you have on hand to cut out 3” diameter with 1” diameter holes. If you’re making doughnuts to fill with jam, then do not cut out the holes. Place the doughnuts and the holes on parchment lined or lightly greased baking sheets, leaving at least 1” space between them.

Re-roll the scraps and cut out more doughnuts. I used the last left over scraps of dough by pinching of bits, rolling them into balls and baking them too.

Let them rise for about 20 minutes or till almost double in size and then bake them at 200C (400F) for about 5 to 10 minutes till they’re done and golden brown. Do not over bake them.

This recipe makes about 12 to 14 doughnuts and holes.

Take them out of the oven and immediately brush them with the melted butter and then dip them into the cinnamon sugar mixture. If filling the doughnuts with jam, let them cool. Put the jam into a piping bag with a writing nozzle/ tip and press into the doughnut from the side and gently press out the jam into the doughnut till it starts oozing out. Jam doughnuts do not need too much jam to fill them. If glazing your doughnuts, let them cool completely and then dip one side of the doughnut in the glaze of your choice and let it set.

Also sending this link to My diverse Kitchen:we knead to bake group

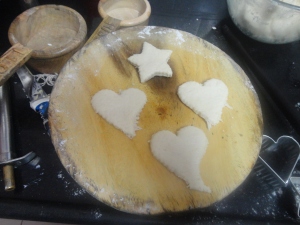
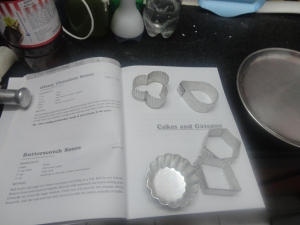
doughnut scraps to be baked cookie cutters and a   book dough of doughnuts failed doughnuts doughnuts turned into cookies

Posted in Uncategorized | Tagged , , , , , , , , , , | 2 Comments

The case of failed bialys and failed dreams

This is a part confession post…And this should be a warning sign, if you want to stop reading this post, i promise i will not blame you . And if you are still reading this post..i love you

As mentioned earlier in my previous post, i am part of this awesome group “we knead to bake” on FB and May’s month’s theme was Bialys.  I started way in the morning but the yeast wouldn’t yield to me.

I summoned to the yeast Gods, pleaded to them and finally got the yeast starting up..all foamy and bit frothy at the top. But only to realize that i had ran out of All purpose flour. So off goes the yeast concoction down the drain.

Nevertheless i started off again with the all the ingredients measured and ready to begin with. I let the dough rest for the first two hours and then again the second rise, but the dough remained soft and sticky…not elastic and non sticky as mentioned in the recipe.

Late in the night (yes 10 pm is midnight at my place), when the dough wouldn’t support me and i was at my wits end, i didn’t want to throw away the yeasted dough, i got this brilliant idea, of making a loaf bread. So off goes the dough into the loaf pan and what i had was nice crusty bread but unfortunately stuck into the pan.

Fortunately i got the chance of making Bialys again. So amidst the chaos of my brother and daddy visiting us and just one sunday. I took extra precautions this time, substituted one part with whole wheat flour and began the bialys journey again.

I saw the videos again and again. So what went wrong this time.Well, the dough was soft and i just couldn’t shape the Bialys. To me they resembled like yeasted tartlets. So once again, what to do with the extra remaining dough, well i formed them into impromptu calzone and baked them..And i wouldn’t call them a success, because no one ate them, except me.

This all string of baking failures, set me thinking am i really worth it all ? The family when they encourage me to bake a cake or especially my mom who inspires me to bake bread or even my brother who teases the hell out of me yet supports my adventures or my colleagues or friends who on any given random day ask me “hey where is the cake ? ”

I really felt, at that point of time, on a hot, humid sunday night..that may be i am not worth it…I suddenly could recall all my past failures of my life & i could see that i have not progressed anywhere at all. I couldn’t even achieve what i loved in my life…baking

Life and its hopes seemed so bleak yesterday night. I cried myself to sleep last night. When all the demons whispered to me that i have to give up but somehow there were well wishers who whispered hope in my ears and i sank into deep sleep later on.

Below this post are the pictures i attempted at baking Bialys. I am not giving up..not soon, not anytime and never. Baking and exlporing new world of baking will always be my passion.

I sincerely thank Aparna for allowing me to be a part of this awesome group. Hop on to her blog and check out some awesome Bialys creation over there by other talented bloggers.

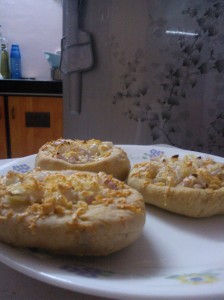
PS :- if you have a tinsy wee bit of time- do listen to this song “let her goBialys-attempt2 WP_001557 WP_001559WP_001517

Posted in Uncategorized | Tagged , , , , , , , , , , , , , , | 2 Comments

Imagine the Torcettini di Saint Vincent

What do you write, when you don’t know what to write ?

Having completed the monthly challenge of “we knead to bake” group early, i was actually DSC00492relaxed. Come the sunny dawn of 24th, and the coveted post was not yet ready. Fellow members already posted their yummylicious links to their blogs & here i was biting my nails at work place and staring at excel sheets. And at those times, when the day comes to an end, you suddenly realize that excel sheets don’t offer you much inspiration.

And as i have noticed, behind every great blog post, there is a story, where as this time yours truly had none. This time is just a post with pictures, random thoughts and appreciation for good things in our lives. Amen

Aparna had this time provided us to bake yeasted cookies. So this time i had two monsters to conquer 1st being nasty yeast and 2nd being  cookie fear.

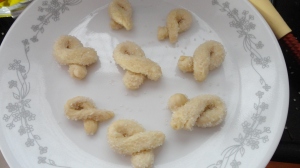
I had baked these cookies last sunday for dear pappa, so that he can take a few to Bombay. And these were a breeze to make. I omitted the lemon rind as mentioned in the recipe, which apparently made the cookies a bit bland, but otherwise they were loved and eaten by us all. Buttery, crunchy and bit like palmiers, these cookies showed a bit of glimpse of picturisque Italian cuisine.

Without much further ado, here i present you the recipe, copied word to word from Aparna .

Torcettini di Saint Vincent

PS :- while writing this post, i was listening to “phir dekhiye” from Rock on, “imagine” by John Lennon.

(Baking and Beatles are close to my heart)

l’origine :- 

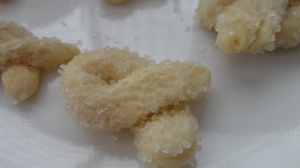
Torcettini are smaller versions of Torcetti (meaning small twists), and these pear/ teardrop shaped twists are made of a dough of flour, yeast and butterwhich are shaped and then rolled in sugar before being baked. These biscuits are synonymous with the town of Saint Vincent in Valle d’Aosta, a small mountainous region in North-Western Italy, even though they’re well known throughout the Piedmont region as well.

The origin of these biscuits is believed to be from Grissini (breadsticks) which were made from the leftover scraps of bread dough. According to one story, a Grissini baker had some leftover butter which he needed to use up. Inspiration struck and he decided to add the butter to the last batch of his Grissini dough for the day. To be able to differentiate this lot of “breadsticks”, he rolled them in sugar and shaped them into loops, and the Torcetti was born. Torcetti/ Torchettinitaste even better when they’re flavoured with lime/ lemon zest or anise.

la description

These biscuits are crunchy, not very sweet and pair very well with cold milk, hot chocolate, tea/ coffee or wine. They are delicious served warm and equally good cold, and keep very well if stored in airtight containers. Apparently, Queen Margaret, the wife of King Umberto I of Savoy loved these biscuits so much during her stay in Valle d’Aosta, that she gave her servants enough provisions to bake an abundant supply for her consumption.

Here’s a video if you want a to see how these biscuits are shaped. (The recipe is a different one) http://www.youtube.com/watch?v=ufOniWuKflA


Torcettini di Saint Vincent

(Adpated from A Baker’s Tour by Nick Malgieri)

Ingredients:

1/2 cup warm water, about 110F

1 1/4 tsp active dry yeast (or 1 tsp instant yeast)

1 1/2 cups all-purpose flour

2 tbsp cocoa powder (if making chocolate torcettini)

1/4 tsp salt

1 tsp lime/ lemon zest (replace with orange zest for the chocolate version)

40gm unsalted butter, cold and cut into small pieces

about 1/3 cup sugar for rolling the cookies

Preparation:

Dissolve the yeast in the warm water, in a small bowl and keep aside.

Put the flour and the salt in the food processor bowl (or a largish regular bowl if kneading by hand) and pulse a couple of times to mix. Add the butter pieces and pulse until the butter is well mixed and the flour-butter mixture looks powdery.

If making chocolate Torcetti, remove 2 tbsp all-purpose flour and add the 2 tbsp unsweetened cocoa powder mentioned in the recipe. Don’t add the lemon zest/ anise. Use orange zest and maybe add 1/ 2 tsp instant coffee powder with the flour.

Add the yeast-water mixture and pulse till it all comes together as a ball. Do not over process or knead. Place the ball of dough in a oiled bowl, turning it so it is well coated with the oil. Cover the bowl, and let the dough rise quite a bit.

This dough does not really double in volume, but it should look “puffy” after about an hour or so. When you pinch off a bit from the top you can see the interior looking a bit like honeycomb. Press down the dough and deflate it, wrap it in cling warp and refrigerate it for at least one hour or up to 24 hours.

(Scroll down for photographs)

all purpose flour in measuring wooden cups

all purpose flour in measuring wooden cups

DSC00494 DSC00488 DSC00489 DSC00492 DSC00477 DSC00478 DSC00479 DSC00484 DSC00485 DSC00492 DSC00493

(please excuse my bad photo editing skills, i am still learning)

Posted in Uncategorized | Tagged , , , , , , , , , , , | 2 Comments

Here comes the sun & hokkaido milk bread Bread…

What could be a more better way to spend your sunday when you are listening to Beatles & baking a Hokkaido milk bread.

I am a part of this amazing, talented group of bread bakers who bake every month with the help of detailed recipe instructions by Aparna who is also the brainchild behind this group.

This is the third month that we are into baking breads and this would be my first time, that i am baking finally upto the schedule or rather rushing up to cross the finish line in time..

Little did i realize that bread baking requires  discipline & time-management,(qualities which your truly lacks)

And i am really glad, that when Aparna rang the warning bell saying that she will remove inactive members (insert my name) who has not baked yet anything from the group. I knew that i had to rise up to the occassion (just (not) like my not so trusty yeast..who rises at its own will)

I literally breathed the bread, followed all the posts on the group and started baking on 24th which is also the last date to submit the entry..

The bread has risen beautifully,  saving grace i should say.

And bread baking has taught me two valuable life lessons:-

1. time managment

2. discipline

And last but not the least- The beatles,my soul satisfying dinnerslathered some butter on to the bread because we all need little bit of sun in our dreary lives.

Recipe :-

I’ve followed the recipe to the T.. May be i will add variations next time. This bread looks so soft and supple. I am happy soul for now.

And as i always say-bread making is like making an instant baby : )

I am not reproducing the whole recipe here, but just the link. sliced breadhokkaido milk breadthe doughThis amazing magical Hokkaido milk breadThe magical hokkaido bread http://www.mydiversekitchen.com/2013/03/we-knead-to-bake-3-hokkaido-milk-bread.html

(this recipe is a keeper)

Posted in Uncategorized | 7 Comments